Thursday, December 29, 2011

Anonymous Email

Anonymous email service enables you to create a disposable email address to protect your privacy online. If you need to give someone your email address, or need to sign up to a website which requires an email address, but you don't wish to reveal your identity.

This service is perfect for the following


  • catch a cheating spouse husband or wife.  
  • find out if your friend is are real friend
  • give warnings to people
  • inform the police about illegal activities
  • inform the tax office about tax cheaters
  • confess your love to somebody
  • play an email joke with your friends
  • when your own email service doesn't work
  • if your private email is banned by the recipient
  • report fraud to your boss or institution
  • and many more reasons...  
Note: By sending a fake email or prank email you may be committing the offence of fraud even you did not intend to. You are not allowed to use this service for any illegal activites at any time.

What's my ip address, create your own visitors IP image


 so don't do anything illegal. If you send death threats, abuse, slander or anything illegal we WILL publish your IP address and block you from this site.

Friday, August 5, 2011

What Is a MAC Address?

The MAC address is a unique value associated with a network adapter. MAC addresses are also known as hardware addresses or physical addresses. They uniquely identify an adapter on a LAN.
MAC addresses are 12-digit hexadecimal numbers (48 bits in length). By convention, MAC addresses are usually written in one of the following two formats:
MM:MM:MM:SS:SS:SS

 
MM-MM-MM-SS-SS-SS
The first half of a MAC address contains the ID number of the adapter manufacturer. These IDs are regulated by an Internet standards body (see sidebar). The second half of a MAC address represents the serial number assigned to the adapter by the manufacturer. In the example,
00:A0:C9:14:C8:29
The prefix
00A0C9
indicates the manufacturer is Intel Corporation.


MAC vs. IP Addressing
Whereas MAC addressing works at the data link layer, IP addressing functions at the network layer   (layer 3). It's a slight oversimplification, but one can think of IP addressing as supporting the software implementation and MAC addresses as supporting the hardware implementation of the network stack. The MAC address generally remains fixed and follows the network device, but the IP address changes as the network device moves from one network to another.
IP networks maintain a mapping between the IP address of a device and its MAC address. This mapping is known as the ARP cache or ARP table.
Find MAC Address of your Computer
  1. Click on the Start Menu.
  2. Click on 'Run & Type 'cmd' without quotes and press Enter.
  3. At the command prompt, type 'ipconfig /all' without quotes. (space between g and /)

How to turn on automatic logon in Windows

turn on automatic logon, follow these steps:
  1. Click Start, and then click Run.
  2. In the Open box, type Regedt32.exe, and then press ENTER.
  3. Locate the following subkey in the registry:
    HKEY_LOCAL_MACHINE\SOFTWARE\Microsoft\Windows NT\CurrentVersion\Winlogon
  4. Double-click the DefaultUserName entry, type your user name, and then click OK.
  5. Double-click the DefaultPassword entry, type your password, and then click OK.NOTE: If the DefaultPassword value does not exist, it must be added. To add the value, follow these steps:

    1. On the Edit menu, click New, and then point to String Value.
    2. Type DefaultPassword, and then press ENTER.
    3. Double-click DefaultPassword.
    4. In the Edit String dialog, type your password and then click OK.
    NOTE: If no DefaultPassword string is specified, Windows automatically changes the value of the AutoAdminLogon key from 1 (true) to 0 (false), disabling the AutoAdminLogon feature

Recovery Console.........?

The Recovery Console is a command line based, advanced diagnostic feature available in some versions of the Windows operating system.
 
What is the Recovery Console Used For?:
The Recovery Console is used to help resolve a number of major system problems.
The Recovery Console is particularly useful for repairing or replacing important operating system files. When these files aren't working like they should, Windows will sometimes not startup at all. In these cases, you must start the Recovery Console to restore the files.

How is the Recovery Console Accessed?:
 
The Recovery Console is usually accessed from the original Windows installation CD. Alternatively, Recovery Console can be accessed from the boot menu but only if it has been preinstalled on your system.
Recovery Console Availability:
The Recovery Console feature is available in Windows XP, Windows 2000, and Windows Server 2003.
Recovery Console is not available in Windows 7 or Windows Vista. Windows Server 2003 and Windows XP were the last Microsoft operating systems that contained Recovery Console.

Use Flash Memory (USB) as Virtual RAM in Windows 7 and Vista

Steps to convert USB memory in to virual RAM memory follow the steps below.

1. Connect USB memory to the computer (Vista or Windows 7)
2. Right click on USB drive and take properties
3. Click on tab ReadyBoost and apply

Note:-In Windows Vista it is limited to 4 GB while in Windows 7 it is upto 256 GB of additional memory by connecting maximum 8 different USB memories. Windows OS older than Vista don't support ReadyBoost technology. Currently Windows Server 2008 is also not supporting ReadyBoost technology.

Make Windows Bootable USB Drive without any Software


Note-OS required Windows,Window 7 DVD & 4 GB Pendrive.

Step1- Login as Administrator
Step2- Format Pendrive in NTFS & make it Active 
Step3-Open cmd prompt & Type  the following command now:
F:\>CD BOOT and hit enter.Where “F” is your DVD drive letter & G: for USB drive
CD BOOT and hit enter to see the below message.
7. Type another command given below to update the USB drive with BOOTMGR compatible code.
BOOTSECT.EXE /NT60 G:
Step4- Copy All Contents from windows 7 DVD to pendrive & install win7 in Mini laptop,notebook from pen drive.


Sunday, February 27, 2011

Computer POST / beep codes

POST ABCs
The computer power-on self-test (POST) tests the computer to make sure it meets the necessary system requirements and that all hardware is working properly before starting the remainder of the boot process. If the computer passes the POST the computer will have a single beep (with some computer BIOS manufacturers it may beep twice) as the computer starts and the computer will continue to start normally. However, if the computer fails
the POST, the computer will either not beep at all or will generate a beep code, which tells the user the source of the problem.
If you're receiving an irregular POST or a beep code not mentioned below follow the POST troubleshooting steps to determine the failing hardware component.
AMI BIOS beep codes
Below are the AMI BIOS Beep codes that can occur. However, because of the wide variety of different computer manufacturers with this BIOS, the beep codes may vary.
AWARD BIOS beep codes
Below are Award BIOS Beep codes that can occur. However, because of the wide variety of different computer manufacturers with this BIOS, the beep codes may vary.
If any other correctable hardware issues, the BIOS will display a message.
IBM BIOS beep codes
Below are general IBM BIOS Beep codes that can occur. However, because of the wide variety of models shipping with this BIOS, the beep codes may vary.
Beep Code
Description
No Beeps
1 Short Beep
Normal POST, computer is ok.
2 Short Beep
POST error, review screen for error code.
Continuous Beep
Repeating Short Beep
One Long and one Short Beep
One Long and Two Short Beeps
One Long and Three Short Beeps.
Three Long Beeps
One Beep, Blank or Incorrect Display
Macintosh startup tones
Tones
Error
Error Tone. (two sets of different tones)
Problem with logic board or SCSI bus.
Startup tone, drive spins, no video
Problem with video controller.
Powers on, no tone.
Logic board problem.
High Tone, four higher tones.
Problem with SIMM.
Phoenix BIOS beep codes
Below are the beep codes for Phoenix BIOS Q3.07 OR 4.X
Beep Code
Description / What to Check
1-1-1-3
Verify Real Mode.
1-1-2-1
Get CPU type.
1-1-2-3
Initialize system hardware.
1-1-3-1
Initialize chipset registers with initial POST values.
1-1-3-2
Set in POST flag.
1-1-3-3
Initialize CPU registers.
1-1-4-1
Initialize cache to initial POST values.
1-1-4-3
Initialize I/O.
1-2-1-1
Initialize Power Management.
1-2-1-2
Load alternate registers with initial POST values.
1-2-1-3
Jump to UserPatch0.
1-2-2-1
Initialize keyboard controller.
1-2-2-3
BIOS ROM checksum.
1-2-3-1
8254 timer initialization.
1-2-3-3
8237 DMA controller initialization.
1-2-4-1
Reset Programmable Interrupt Controller.
1-3-1-1
Test DRAM refresh.
1-3-1-3
Test 8742 Keyboard Controller.
1-3-2-1
Set ES segment to register to 4 GB.
1-3-3-1
28 Autosize DRAM.
1-3-3-3
Clear 512K base RAM.
1-3-4-1
Test 512 base address lines.
1-3-4-3
Test 512K base memory.
1-4-1-3
Test CPU bus-clock frequency.
1-4-2-4
Reinitialize the chipset.
1-4-3-1
Shadow system BIOS ROM.
1-4-3-2
Reinitialize the cache.
1-4-3-3
Autosize cache.
1-4-4-1
Configure advanced chipset registers.
1-4-4-2
Load alternate registers with CMOS values.
2-1-1-1
Set Initial CPU speed.
2-1-1-3
Initialize interrupt vectors.
2-1-2-1
Initialize BIOS interrupts.
2-1-2-3
Check ROM copyright notice.
2-1-2-4
Initialize manager for PCI Options ROMs.
2-1-3-1
Check video configuration against CMOS.
2-1-3-2
Initialize PCI bus and devices.
2-1-3-3
Initialize all video adapters in system.
2-1-4-1
Shadow video BIOS ROM.
2-1-4-3
Display copyright notice.
2-2-1-1
Display CPU type and speed.
2-2-1-3
Test keyboard.
2-2-2-1
Set key click if enabled.
2-2-2-3
56 Enable keyboard.
2-2-3-1
Test for unexpected interrupts.
2-2-3-3
Display prompt Press F2 to enter SETUP.
2-2-4-1
Test RAM between 512 and 640k.
2-3-1-1
Test expanded memory.
2-3-1-3
Test extended memory address lines.
2-3-2-1
Jump to UserPatch1.
2-3-2-3
Configure advanced cache registers.
2-3-3-1
Enable external and CPU caches.
2-3-3-3
Display external cache size.
2-3-4-1
Display shadow message.
2-3-4-3
Display non-disposable segments.
2-4-1-1
Display error messages.
2-4-1-3
Check for configuration errors.
2-4-2-1
Test real-time clock.
2-4-2-3
Check for keyboard errors
2-4-4-1
Set up hardware interrupts vectors.
2-4-4-3
Test coprocessor if present.
3-1-1-1
Disable onboard I/O ports.
3-1-1-3
Detect and install external RS232 ports.
3-1-2-1
Detect and install external parallel ports.
3-1-2-3
Re-initialize onboard I/O ports.
3-1-3-1
Initialize BIOS Data Area.
3-1-3-3
Initialize Extended BIOS Data Area.
3-1-4-1
Initialize floppy controller.
3-2-1-1
Initialize hard-disk controller.
3-2-1-2
Initialize local-bus hard-disk controller.
3-2-1-3
Jump to UserPatch2.
3-2-2-1
Disable A20 address line.
3-2-2-3
Clear huge ES segment register.
3-2-3-1
Search for option ROMs.
3-2-3-3
Shadow option ROMs.
3-2-4-1
Set up Power Management.
3-2-4-3
Enable hardware interrupts.
3-3-1-1
Set time of day.
3-3-1-3
Check key lock.
3-3-3-1
Erase F2 prompt.
3-3-3-3
Scan for F2 key stroke.
3-3-4-1
Enter SETUP.
3-3-4-3
Clear in-POST flag.
3-4-1-1
Check for errors
3-4-1-3
POST done--prepare to boot operating system.
3-4-2-1
One beep.
3-4-2-3
Check password (optional).
3-4-3-1
Clear global descriptor table.
3-4-4-1
Clear parity checkers.
3-4-4-3
Clear screen (optional).
3-4-4-4
Check virus and backup reminders.
4-1-1-1
Try to boot with INT 19.
4-2-1-1
Interrupt handler error.
4-2-1-3
Unknown interrupt error.
4-2-2-1
Pending interrupt error.
4-2-2-3
Initialize option ROM error.
4-2-3-1
Shutdown error.
4-2-3-3
Extended Block Move.
4-2-4-1
Shutdown 10 error.
4-3-1-3
Initialize the chipset.
4-3-1-4
Initialize refresh counter.
4-3-2-1
Check for Forced Flash.
4-3-2-2
Check HW status of ROM.
4-3-2-3
BIOS ROM is OK.
4-3-2-4
Do a complete RAM test.
4-3-3-1
Do OEM initialization.
4-3-3-2
Initialize interrupt controller.
4-3-3-3
Read in bootstrap code.
4-3-3-4
Initialize all vectors.
4-3-4-1
Boot the Flash program.
4-3-4-2
Initialize the boot device.
4-3-4-3
Boot code was read OK.

Thursday, February 3, 2011

Windows Registry Tutorial


Overview
The Registry is a database used to store settings and options for the 32 bit versions of Microsoft Windows including Windows 95, 98, ME and NT/2000. It contains information and settings for all the hardware, software, users, and preferences of the PC. Whenever a user makes changes to a Control Panel settings, or File Associations, System Policies, or installed software, the changes are reflected and stored in the Registry.
The physical files that make up the registry are stored differently depending on your version of Windows; under Windows 95 & 98 it is contained in two hidden files in your Windows directory, called USER.DAT and SYSTEM.DAT, for Windows Me there is an additional CLASSES.DAT file, while under Windows NT/2000 the files are contained seperately in the %SystemRoot%\System32\Config directory. You can not edit these files directly, you must use a tool commonly known as a "Registry Editor" to make any changes (using registry editors will be discussed later in the article).
The Structure of the Registry
The Registry has a hierarchal structure, although it looks complicated the structure is similar to the directory structure on your hard disk, with Regedit being similar to Windows Explorer.
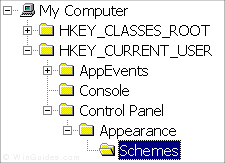
Registry Structure Each main branch (denoted by a folder icon in the Registry Editor, see left) is called a Hive, and Hives contains Keys. Each key can contain other keys (sometimes referred to as sub-keys), as well as Values. The values contain the actual information stored in the Registry. There are three types of values; String, Binary, and DWORD - the use of these depends upon the context.
There are six main branches, each containing a specific portion of the information stored in the Registry. They are as follows:
  • HKEY_CLASSES_ROOT - This branch contains all of your file association mappings to support the drag-and-drop feature, OLE information, Windows shortcuts, and core aspects of the Windows user interface.
  • HKEY_CURRENT_USER - This branch links to the section of HKEY_USERS appropriate for the user currently logged onto the PC and contains information such as logon names, desktop settings, and Start menu settings.
  • HKEY_LOCAL_MACHINE - This branch contains computer specific information about the type of hardware, software, and other preferences on a given PC, this information is used for all users who log onto this computer.
  • HKEY_USERS - This branch contains individual preferences for each user of the computer, each user is represented by a SID sub-key located under the main branch.
  • HKEY_CURRENT_CONFIG - This branch links to the section of HKEY_LOCAL_MACHINE appropriate for the current hardware configuration.
  • HKEY_DYN_DATA - This branch points to the part of HKEY_LOCAL_MACHINE, for use with the Plug-&-Play features of Windows, this section is dymanic and will change as devices are added and removed from the system.
Each registry value is stored as one of five main data types:
  • REG_BINARY - This type stores the value as raw binary data. Most hardware component information is stored as binary data, and can be displayed in an editor in hexadecimal format.
  • REG_DWORD - This type represents the data by a four byte number and is commonly used for boolean values, such as "0" is disabled and "1" is enabled. Additionally many parameters for device driver and services are this type, and can be displayed in REGEDT32 in binary, hexadecimal and decimal format, or in REGEDIT in hexadecimal and decimal format.
  • REG_EXPAND_SZ - This type is an expandable data string that is string containing a variable to be replaced when called by an application. For example, for the following value, the string "%SystemRoot%" will replaced by the actual location of the directory containing the Windows NT system files. (This type is only available using an advanced registry editor such as REGEDT32)
  • REG_MULTI_SZ - This type is a multiple string used to represent values that contain lists or multiple values, each entry is separated by a NULL character. (This type is only available using an advanced registry editor such as REGEDT32)
  • REG_SZ - This type is a standard string, used to represent human readable text values.
Other data types not available through the standard registry editors include:
  • REG_DWORD_LITTLE_ENDIAN - A 32-bit number in little-endian format.
  • REG_DWORD_BIG_ENDIAN - A 32-bit number in big-endian format.
  • REG_LINK - A Unicode symbolic link. Used internally; applications should not use this type.
  • REG_NONE - No defined value type.
  • REG_QWORD - A 64-bit number.
  • REG_QWORD_LITTLE_ENDIAN - A 64-bit number in little-endian format.
  • REG_RESOURCE_LIST - A device-driver resource list.
Editing the Registry
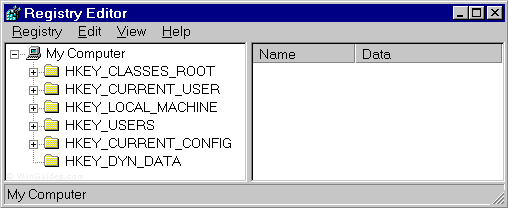
The Registry Editor (REGEDIT.EXE) is included with most version of Windows (although you won't find it on the Start Menu) it enables you to view, search and edit the data within the Registry. There are several methods for starting the Registry Editor, the simplest is to click on the Start button, then select Run, and in the Open box type "regedit", and if the Registry Editor is installed it should now open and look like the image below.
Picture of regedit.exe
An alternative Registry Editor (REGEDT32.EXE) is available for use with Windows NT/2000, it includes some additional features not found in the standard version, including; the ability to view and modify security permissions, and being able to create and modify the extended string values REG_EXPAND_SZ & REG_MULTI_SZ.
Create a Shortcut to Regedit
This can be done by simply right-clicking on a blank area of your desktop, selecting New, then Shortcut, then in the Command line box enter "regedit.exe" and click Next, enter a friendly name (e.g. 'Registry Editor') then click Finish and now you can double click on the new icon to launch the Registry Editor.

Using Regedit to modify your Registry
Once you have started the Regedit you will notice that on the left side there is a tree with folders, and on the right the contents (values) of the currently selected folder.

Like Windows explorer, to expand a certain branch (see the structure of the registry section), click on the plus sign [+] to the left of any folder, or just double-click on the folder. To display the contents of a key (folder), just click the desired key, and look at the values listed on the right side. You can add a new key or value by selecting New from the Edit menu, or by right-clicking your mouse. And you can rename any value and almost any key with the same method used to rename files; right-click on an object and click rename, or click on it twice (slowly), or just press F2 on the keyboard. Lastly, you can delete a key or value by clicking on it, and pressing Delete on the keyboard, or by right-clicking on it, and choosing Delete.
Note: it is always a good idea to backup your registry before making any changes to it. It can be intimidating to a new user, and there is always the possibility of changing or deleting a critical setting causing you to have to reinstall the whole operating system. It's much better to be safe than sorry!
Importing and Exporting Registry Settings
A great feature of the Registry Editor is it's ability to import and export registry settings to a text file, this text file, identified by the .REG extension, can then be saved or shared with other people to easily modify local registry settings. You can see the layout of these text files by simply exporting a key to a file and opening it in Notepad, to do this using the Registry Editor select a key, then from the "Registry" menu choose "Export Registry File...", choose a filename and save. If you open this file in notepad you will see a file similar to the example below:
REGEDIT4

[HKEY_LOCAL_MACHINE\SYSTEM\Setup]
"SetupType"=dword:00000000
"CmdLine"="setup -newsetup"
"SystemPrefix"=hex:c5,0b,00,00,00,40,36,02
The layout is quite simple, REGEDIT4 indicated the file type and version, [HKEY_LOCAL_MACHINE\SYSTEM\Setup] indicated the key the values are from, "SetupType"=dword:00000000 are the values themselves the portion after the "=" will vary depending on the type of value they are; DWORD, String or Binary.
So by simply editing this file to make the changes you want, it can then be easily distributed and all that need to be done is to double-click, or choose "Import" from the Registry menu, for the settings to be added to the system Registry.
Deleting keys or values using a REG file
It is also possible to delete keys and values using REG files. To delete a key start by using the same format as the the REG file above, but place a "-" symbol in front of the key name you want to delete. For example to delete the [HKEY_LOCAL_MACHINE\SYSTEM\Setup] key the reg file would look like this:

REGEDIT4

[-HKEY_LOCAL_MACHINE\SYSTEM\Setup]
The format used to delete individual values is similar, but instead of a minus sign in front of the whole key, place it after the equal sign of the value. For example, to delete the value "SetupType" the file would look like:
REGEDIT4

[HKEY_LOCAL_MACHINE\SYSTEM\Setup]
"SetupType"=-
Use this feature with care, as deleting the wrong key or value could cause major problems within the registry, so remember to always make a backup first.
Regedit Command Line Options
Regedit has a number of command line options to help automate it's use in either batch files or from the command prompt. Listed below are some of the options, please note the some of the functions are operating system specific.

regedit.exe [options] [filename] [regpath]
[filename]
Import .reg file into the registry
/s [filename]
Silent import, i.e. hide confirmation box when importing files
/e [filename] [regpath]
Export the registry to [filename] starting at [regpath] e.g. regedit /e file.reg HKEY_USERS\.DEFAULT
/L:system
Specify the location of the system.dat to use
/R:user
Specify the location of the user.dat to use
C [filename]
Compress (Windows 98)
/D [regpath]
Delete the specified key (Windows 98)
Maintaining the Registry
On Windows NT you can use either the "Last Known Good" option or RDISK to restore to registry to a stable working configuration.
How can I clean out old data from the Registry?
Although it's possible to manually go through the Registry and delete unwanted entries, Microsoft provides a tool to automate the process, the program is called RegClean. RegClean analyzes Windows Registry keys stored in a common location in the Windows Registry. It finds keys that contain erroneous values, it removes them from the Windows Registry after having recording those entries in the Undo.Reg file.

Monday, January 31, 2011

dual-boot Vista with XP

How to dual-boot Vista with XP (with XP installed first) - step-by-step

Step-1 during windows Xp installation, press "Shift+F10" Key.
            cmd prompt will be open

step2  Then type in DISKPART and press enter to get into the DISKPART utility.


Step 3 Now type in LIST VOLUME


Step 4  Now type SELECT VOLUME 0 (main Windows XP volume).

Step5 Now type in SHRINK.it will reduce the size the selected Volume by around 50%.

Step 6 Now Install Vista.


Thursday, January 27, 2011

Change Installation Directory from Registry

To change the default installation path, just follow below steps:
 
1. Navigate to HKEY_LOCAL_MACHINE\SOFTWARE\Microsoft\Windows\CurrentVersion.
2. At the right panel, look for ProgramFilesDir.

3. Double click on it to change the value to your desired path. For example, change the value from C:\Program Files to D:\Softwares.

Thursday, January 20, 2011

How to Test the Working of your Antivirus – EICAR Test

he process is called EICAR test which will work on any antivirus and was developed by European Institute of Computer Antivirus Research. This process can be used by people, companies and antivirus programmers to test the proper functioning of the antivirus/antimalware software without having to deal with the real computer virus which can cause damage to the computer. Here is a step-by-step procedure to test your antivirus.
1. Open a notepad (New Text Document.TXT) and copy the following code exactly onto it, and save the notepad.

2. Rename the file from New Text Document.TXT to myfile.com
3. Now run the antivirus scan on this myfile.com file.
If the antivirus is functioning properly on your computer, then it should generate a warning and immediately delete the file upon scanning. Otherwise you may have to re-install your antivirus.

ADD "Send To" option in right click menu

start run menu---->type sendto

then the followin path will be open-
path=C:\Documents and Settings\Administrator\SendTo


copy shortcut of any drive or folder then it shows in right click option.

Online data Storage

GMail Drive creates a virtual filesystem on top of your Google GMail account and enables you to save and retrieve files stored on your GMail account directly from inside Windows Explorer. GMail Drive literally adds a new drive to your computer under the My Computer folder, where you can create new folders, copy and drag'n'drop files to.

Download Gmail drive from followin link--
http://www.softpedia.com/dyn-postdownload.php?p=15944&t=4&i=1

some other sites which provides online storage like 4shared.com,ADrive.com,opendrive.com etc.

Wednesday, January 19, 2011

Install Windows

http://www.buildeasypc.com/sw/software.htm

front panal switches & LEDs header

Make windows genuine in a minute


Make your Windows XP with Service Pack 2 geniune.

This procedure described below will allow you to bypass the Microsoft Genuine Validation.
I hope this is the best way to make your copy of windows xp geniune.

Step 1:
 Click Start and then go to run and type ‘regedit

Step 2:
Registry window will be opened, Then Go to
HKEY_LOCAL_MACHINE\
SOFTWARE\MICROSOFT\Windows NT\CurrentVersion\WPAEvents\OOBETimer

and double click on it. Then change some of the value data to any thing.

Step 3:
Go to start > run > “%systemroot%\system32\oobe\msoobe.exe /a” (again, dont type the quotes)

Step 4:
The activation screen will come up, click on register over telephone, then click on CHANGE
PRODUCT KEY, enter in this key: JG28K-H9Q7X-BH6W4-3PDCQ-6XBFJ.

Now you can download all the updates without activating, and the Genuine
Microsoft Validation will irritate you No more.

Windows Shortcuts keys

Here are some windoes shortcut keys
Windows Shortcuts keys
Alt + E — Opens the Edit menu
Alt + Enter — Opens the Properties window
Alt + F — Opens the File menu
Alt + F4 — Closes the current program
Alt + Print — Screen Takes a screen shot of the current window or program
Alt + Tab — Switches between the programs currently in use
CTRL+TAB — SWITCHES BETWEEN TAB IN DIALOG BOX,I.E 7
Ctrl + A — Selects all text
Ctrl + C — Copies the selected object
Ctrl + End — Jumps to the end of the current document
Ctrl + Esc — Opens the Start menu
Ctrl + F4 — Closes the current program
Ctrl + Home — Jumps to the beginning of the current document
Ctrl + Insert — Copies the selected object

Ctrl + left arrow — Moves to the left one word
Ctrl + right arrow — Moves to the right one word
Ctrl + V — Pastes the selected object
Ctrl + X — Cuts the selected object
Ctrl + the “+”key — Perfectly resizes the width of Explorer columns
End — Jumps to the end of the current line
F1 — Opens the Help menu
F2 — Renames the selected icon
F3 — Launches the Search Companion in a folder or on the
desktop

F4 — Accesses the Address Bar in a folder or window
F5 — Refreshes the contents of a folder or window
Home — Jumps to the beginning of the current line
Shift + Delete — Permanently deletes files (bypasses the Recycle Bin)
Shift + End — Highlights text from the current position to the end of
the line
Shift + F10 — Substitutes for a right-click
Shift + Home — Highlights text from the current position to the
beginning of the line
Shift + Insert — Pastes the selected object
Shift while inserting — Prevents the CD player from playing an audio CD

Shortcuts for Keyboards with a “Windows”Key (Resembling a Flag)

Windows Key + E — Opens Windows Explorer
Windows Key + F — Launches the Windows Search Companion
Windows Key + F1 — Opens the Help and Support Center
Windows Key + L — Locks down Windows
Windows Key + M — Minimizes all windows and shows the desktop
Windows Key + M + Shift — Undoes the minimize
Windows Key + Opens — the System Properties window
Pause/Break key
Windows Key + R — Opens the Run window
Windows Key + U — Launches the Utility Manager
WINDOWS KEY+U — MINIMIZES ALL WINDOWS AND GOES TO DESKTOP


BASIC SHORTCUT KEYS:

Alt + F File menu options in current program
Alt + E Edit options in current program
F1 Universal help (for all programs)
Ctrl + A Select all text
Ctrl + X Cut selected item
Shift + Del Cut selected item
Ctrl + C Copy selected item
Ctrl + Ins Copy selected item
Ctrl + V Paste
Shift + Ins Paste
Home Go to beginning of current line
Ctrl + Home Go to beginning of document
End Go to end of current line
Ctrl + End Go to end of document
Shift + Home Highlight from current position to beginning of line
Shift + End Highlight from current position to end of line
Ctrl + f Move one word to the left at a time
Ctrl + g Move one word to the right at a time

MICROSOFT WINDOWS SHORTCUT KEYS:

Alt + Tab Switch between open applications
Alt + Shift + Tab Switch backwards between open applications
Alt + Print Screen Create screen shot for current program
Ctrl + Alt + Del Reboot/Windows® task manager
Ctrl + Esc Bring up start menu
Alt + Esc Switch between applications on taskbar
F2 Rename selected icon
F3 Start find from desktop
F4 Open the drive selection when browsing
F5 Refresh contents
Alt + F4 Close current open program
Ctrl + F4 Close window in program
Ctrl + Plus Key Automatically adjust widths of all columns in Windows Explorer
Alt + Enter Open properties window of selected icon or program
Shift + F10 Simulate right-click on selected item
Shift + Del Delete programs/files permanently
Holding Shift During Bootup
Boot safe mode or bypass system files
Holding Shift During Bootup
When putting in an audio CD, will prevent
CD Player from playing

WINKEY SHORTCUTS:

WINKEY + D Bring desktop to the top of other windows
WINKEY + M Minimize all windows
WINKEY + SHIFT + M Undo the minimize done by
WINKEY + M and WINKEY + D
WINKEY + E Open Microsoft Explorer
WINKEY + Tab Cycle through open programs on taskbar
WINKEY + F Display the Windows® Search/Find feature
WINKEY + CTRL + F Display the search for computers window
WINKEY + F1 Display the Microsoft® Windows® help
WINKEY + R Open the run window
WINKEY + Pause /Break Open the system properties window
WINKEY + U Open utility manager
WINKEY + L Lock the computer (Windows XP® & later)

OUTLOOK SHORTCUT KEYS:

Alt + S Send the email
Ctrl + C Copy selected text
Ctrl + X Cut selected text
Ctrl + P Open print dialog box
Ctrl + K Complete name/email typed in address bar
Ctrl + B Bold highlighted selection
Ctrl + I Italicize highlighted selection
Ctrl + U Underline highlighted selection
Ctrl + R Reply to an email
Ctrl + F Forward an email
Ctrl + N Create a new email
Ctrl + Shift + A Create a new appointment to your calendar
Ctrl + Shift + O Open the outbox
Ctrl + Shift + I Open the inbox
Ctrl + Shift + K Add a new task
Ctrl + Shift + C Create a new contact
Ctrl + Shift+ J Create a new journal entry

WORD SHORTCUT KEYS:

Ctrl + A Select all contents of the page
Ctrl + B Bold highlighted selection
Ctrl + C Copy selected text
Ctrl + X Cut selected text
Ctrl + N Open new/blank document
Ctrl + O Open options
Ctrl + P Open the print window
Ctrl + F Open find box
Ctrl + I Italicize highlighted selection
Ctrl + K Insert link
Ctrl + U Underline highlighted selection
Ctrl + V Paste
Ctrl + Y Redo the last action performed
Ctrl + Z Undo last action
Ctrl + G Find and replace options
Ctrl + H Find and replace options
Ctrl + J Justify paragraph alignment
Ctrl + L Align selected text or line to the left
Ctrl + Q Align selected paragraph to the left
Ctrl + E Align selected text or line to the center
Ctrl + R Align selected text or line to the right
Ctrl + M Indent the paragraph
Ctrl + T Hanging indent
Ctrl + D Font options
Ctrl + Shift + F Change the font
Ctrl + Shift + > Increase selected font +1
Ctrl + ] Increase selected font +1
Ctrl + Shift + < Decrease selected font -1
Ctrl + [ Decrease selected font -1
Ctrl + Shift + * View or hide non printing characters
Ctrl + f Move one word to the left
Ctrl + g Move one word to the right
Ctrl + h Move to beginning of the line or paragraph
Ctrl + i Move to the end of the paragraph
Ctrl + Del Delete word to right of cursor
Ctrl + Backspace Delete word to left of cursor
Ctrl + End Move cursor to end of document
Ctrl + Home Move cursor to beginning of document
Ctrl + Space Reset highlighted text to default font
Ctrl + 1 Single-space lines
Ctrl + 2 Double-space lines
Ctrl + 5 1.5-line spacing
Ctrl + Alt + 1 Change text to heading 1
Ctrl + Alt + 2 Change text to heading 2
Ctrl + Alt + 3 Change text to heading 3
F1 Open help
Shift + F3 Change case of selected text
Shift + Insert Paste
F4 Repeat last action performed (Word 2000+)
F7 Spell check selected text and/or document
Shift + F7 Activate the thesaurus
F12 Save as
Ctrl + S Save
Shift + F12 Save
Alt + Shift + D Insert the current date
Alt + Shift + T Insert the current time
Ctrl + W Close document

EXCEL SHORTCUT KEYS:

F2 Edit the selected cell
F5 Go to a specific cell
F7 Spell check selected text and/or document
F11 Create chart
Ctrl + Shift + ; Enter the current time
Ctrl + ; Enter the current date
Alt + Shift + F1 Insert new worksheet
Shift + F3 Open the Excel® formula window
Shift + F5 Bring up search box
Ctrl + A Select all contents of worksheet
Ctrl + B Bold highlighted selection
Ctrl + I Italicize highlighted selection
Ctrl + C Copy selected text
Ctrl + V Paste
Ctrl + D Fill
Ctrl + K Insert link
Ctrl + F Open find and replace options
Ctrl + G Open go-to options
Ctrl + H Open find and replace options
Ctrl + U Underline highlighted selection
Ctrl + Y Underline selected text
Ctrl + 5 Strikethrough highlighted selection
Ctrl + O Open options
Ctrl + N Open new document
Ctrl + P Open print dialog box
Ctrl + S Save
Ctrl + Z Undo last action
Ctrl + F9 Minimize current window
Ctrl + F10 Maximize currently selected window
Ctrl + F6 Switch between open workbooks/windows
Ctrl + Page up & Page Down
Move between Excel worksheets in the same document
Ctrl + Tab Move between two or more open Excel files
Alt + = Create formula to sum all of above cells
Ctrl + ‘ Insert value of above cell into cur
Ctrl + Shift + ! Format number in comma format
Ctrl + Shift + $ Format number in currency format
Ctrl + Shift + # Format number in date format
Ctrl + Shift + % Format number in percentage format
Ctrl + Shift + ^ Format number in scientific format
Ctrl + Shift + @ Format number in time format
Ctrl + g Move to next section of text
Ctrl + Space Select entire column
Shift + Space Select entire row
Ctrl + W Close document

How to increase your internet speed

The following post is on will tell you some methods to increase your internet speed,I will show you some ways to increase your net and browser speed

Go to Start>>Run and then type in “gpedit.msc” without the quotes (“)

Computer Configuration -> Administrative Templates -> Network -> QoS Packet Scheduler.
after that, you should see something like “Limit Reservable Bandwidth”. Modify that and set it to “Disabled”, or you can put it to “Enabled” and change the value to 0.

Now this will increase your internet speed by 20%

Remove Internet Explorer Password

Step:-
1-Go to Run Menu
2-type "regedit"(without any quote)
3-Go to following Path-
HKLM\Software\Microsoft\Windows\Current Version\Polices\Ratings

delete the following 2 entries in right pane
named "hints" & " "key"